Personal Projects
This page is dedicated to the miscellaneous projects I've worked on at home. From modding handhelds to working on my car. If I spent enough time to break something, it's documented here!
WIP Projects
I have two adjacent projects that I'm currently working on. One is to create a custom videogame controller using my favorite buttons from various other gamepads. The other, which serves as a stepping stone for the first, is to modify one of my existing videogame controllers to use metal dome switches for it's face buttons, instead of relying on mushy-feeling conductive rubber buttons. My goal is to modify the existing controller to refamiliarize myself with the process of setting up inputs, then I'll move onto the custom gamepad.
I've already started on the preliminary controller-mod project, but have run into some hitches.
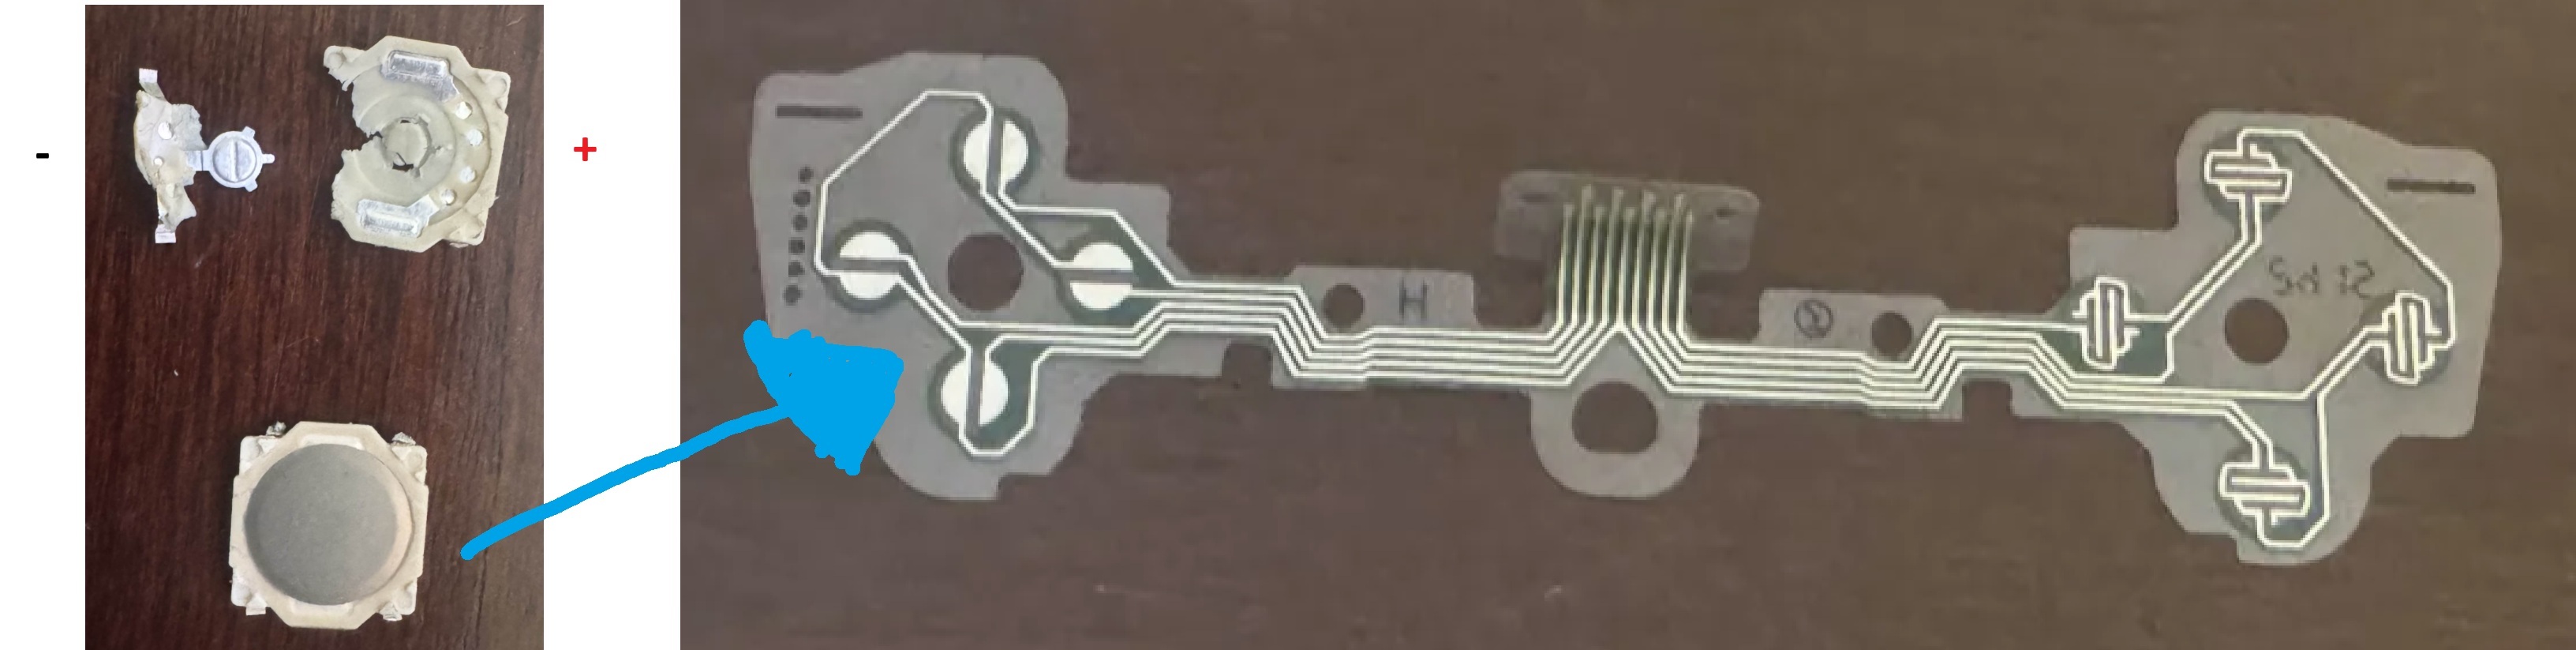
The metal dome switches that I'm using are pulled from some spare PSVita parts, and a point of difficulty is that the soldering points are located beneath the actual buttons.
Meaning I can't establish the connections using a standard soldering iron, but I can use lead-free solder paste and an electric soldering hot plate. Unfortunately, I never used this technique.
I can't get experience without trying, though, so I went ahead and gave it a shot.
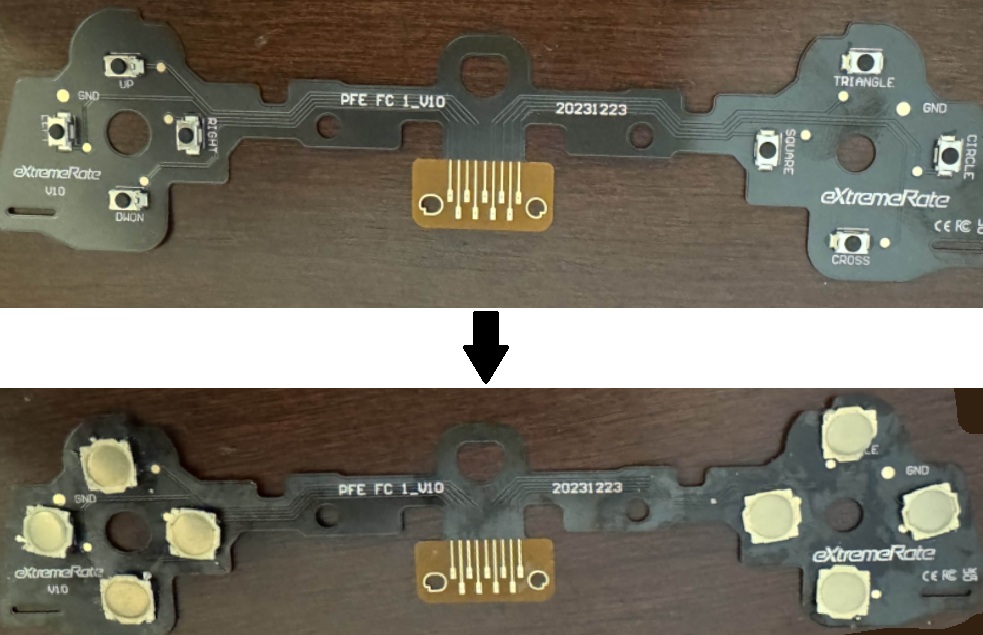
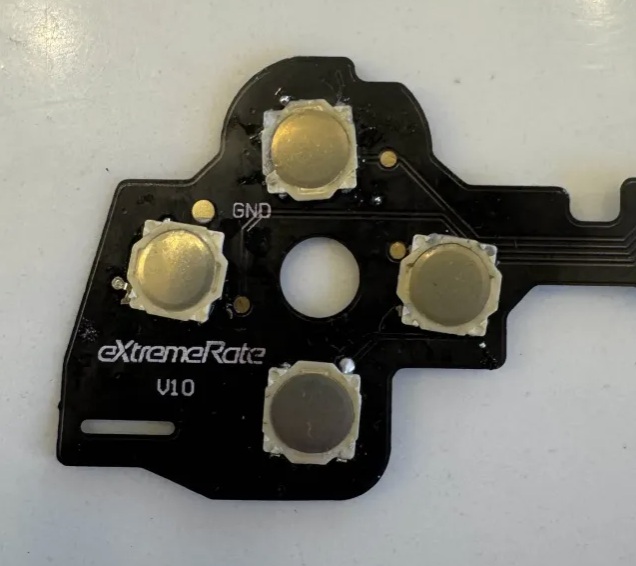
It was semi-succesfull for a first attempt. I soldered the metal domes onto the board, but some of them are angled weirdly and slightly off-center from their intended positions.
The connections DO work, however the positioning of the metal domes makes for poor tactile feedback when actually pressing the buttons. Furthermore, when I try to resolder the domes, the flux in the solder paste has
a chance of getting into the metal domes itself, making it all.. squishy. For now, I've gone back to the default hardware. I want to go at it again, but I've used up all my metal domes so I need to wait on shipping.

Microsoldering!?
One of my hobbies is playing videogames, so naturally I have a Nintendo Switch. While I love the system, it certainly shows its age when trying to play modern games.
To alleviate this issue, I took on the task of modding my console so I could overclock it. This process isn't as simple as a plugging in a SD card with preloaded code, though .
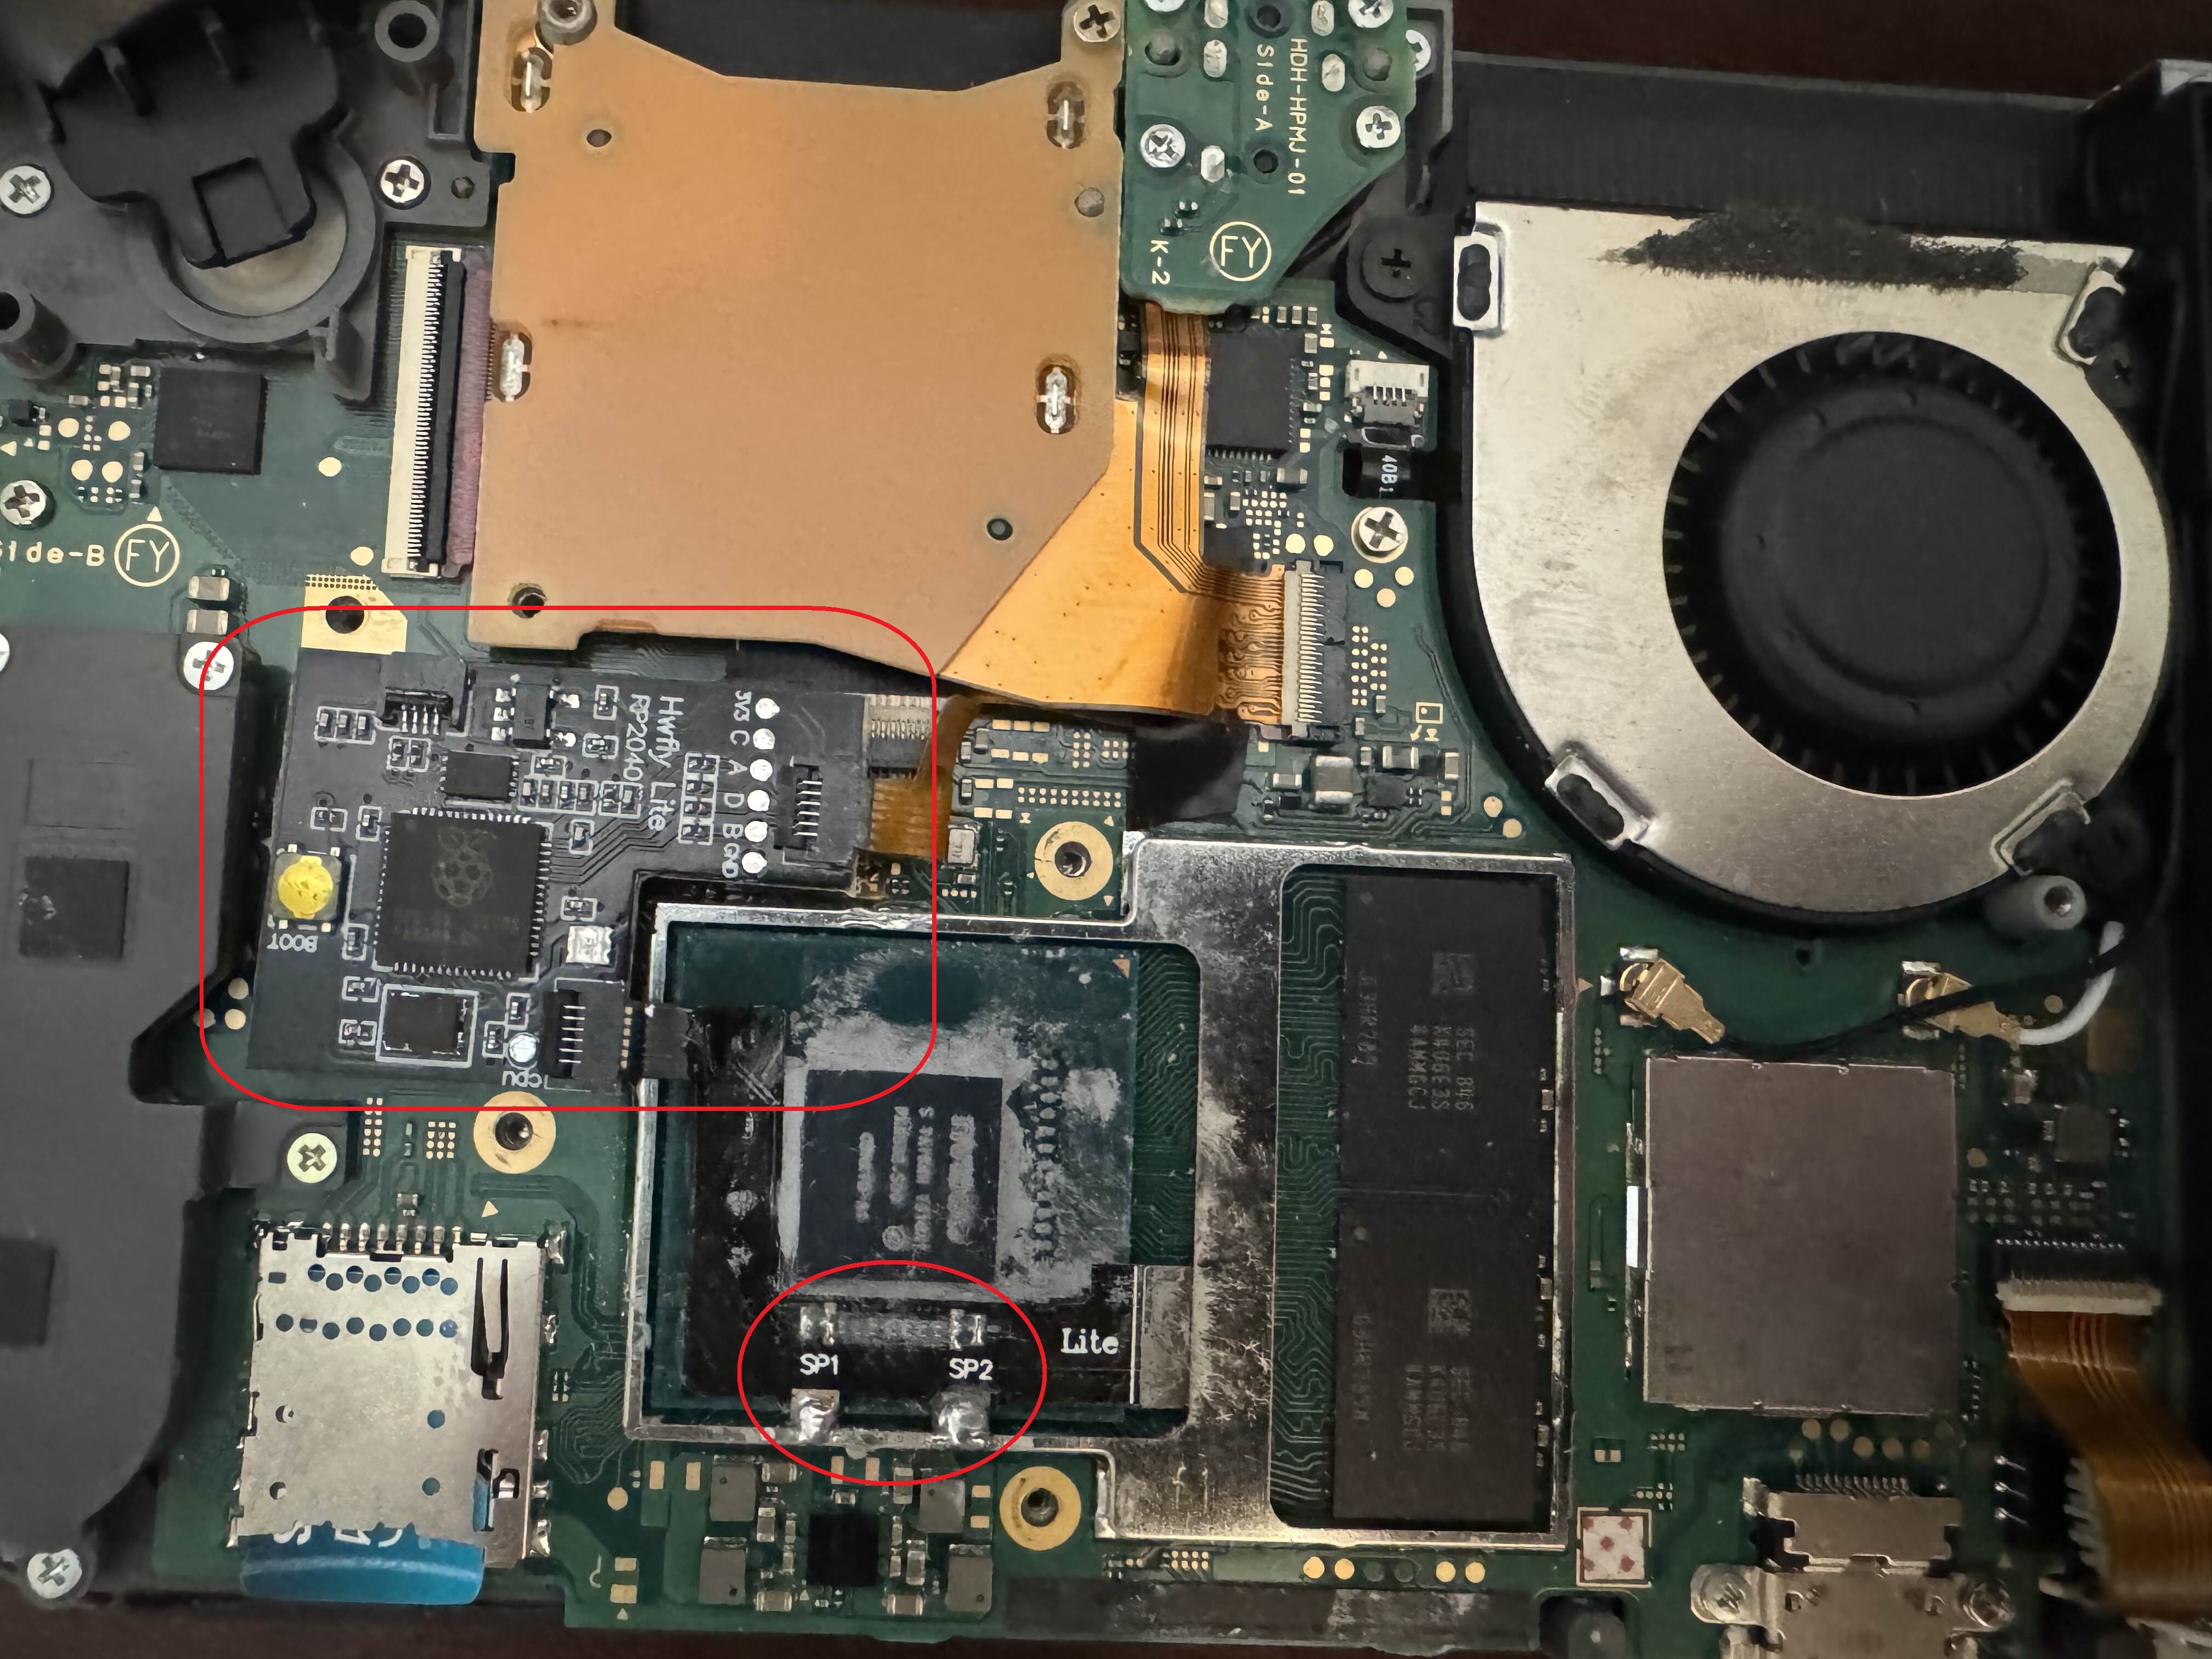
It requires a RP2040 microcontroller to be physically soldered onto the mainboard - a permanent modification on hardware so small that it requires a microscope just to see whats happening!
Luckily, I had some introductory soldering experience under my belt from the SpaceWorks electives. So jumping into microsoldering shouldn't be too hard, right? Well, kinda. I didn't use a microscope, just my phone camera.
So it was difficult to do as a beginner, but I knew that going into it - I just made sure to take things slow and think carefully before every action. The worst thing one can do when working with electonic hardware
is try to rush things. It took two hours and a lot of water breaks (garage + Arizona summer), but the mod worked!
NOTE: I didn't get any good pictures of the results during the process, so I took the system apart partially to get better ones. The image you see below looks dirty because I only captured the 6 solder points near the CPU (~8 not imaged),
which had a lot of thermal paste on the surrounding area. I didn't want to risk desoldering anything so I only cleaned the area up mildly.
3D Printer Upgrades
Over the years with my Ender 3 Pro, I've succumbed to the addiction of making upgrades to allow for more efficient and quiet printing. Some key mods I've made over the years include:
- Replaced the main board with a BigTreeTech SKR Mini E3 to allow for additional modifications and less noise.
- Installed a BLTouch kit, which makes use of a mechanical push-pin and hall sensor to automatically level the printing board, removing the need to manually adjust the printer bed before each print.
- Made an enclosure to reduce noise and maintain a stable printing environment temperature.